I've been quoted as saying (okay, more like known as a broken record for saying) create the action plan and then work the plan. Because I truly believe that it is as simple as that.
At the same time, there are a lot of people who are great at planning, but less at action. They create inspired, ambitious strategies and then those plans sit there just collecting dust. For many, what is missing is that execution component of a strategy. And so when the strategy doesn't work, because no plan is worth the paper it's written on if it isn't also put in into implementation mode, they write off the strategy as not having worked — when what didn't work, was them. Or sometimes people do take that extra step of creating action plans, but they get overly ambitious or don't identify the right actions.
At the same time, while action is important (and I would argue that it's even more important than strategy to a certain degree), you definitely don’t want to forego the plan completely. That’ll have you spinning your wheels into wrong direction and leave you feeling frustrated about where those aimless wheels have taken you.
I like to estimate it at 10-90. So 10% of your effort should be spent on creating the strategy, making sure you're going in the right place, identifying your goals, developing the key metrics that you're going to be watching for in order to know you're going in the right direction. But the other 90% should be spent on actually implementing that strategy and taking action. AKA working the plan.
I have a tool that I’ve been using myself and this year with my masterminders that has changed the productivity puzzle. It’s a tool that overlays on top of your quarterly or monthly strategies and allows you to (a) turn those strategies into an action plan and (b) make sure you’re creating an action that is doable, realistic and aligned.
In this post, I’m going to walk you through the steps of how to use it for yourself, but make you download a copy of it here (copy into your own Google Drive account – you won’t be able to edit this copy directly!)
Prefer a video walkthrough?
STEP 1: GATHER YOUR ACTION PLANNING TOOLS
Before we start, you’ll want to make sure you have a few key items at the ready: your monthly (or quarterly – even though you’ll be doing this monthly action planning process for just the month) strategy with the goals and projects you want to be working on identified. A copy of the spreadsheet and a calendar.
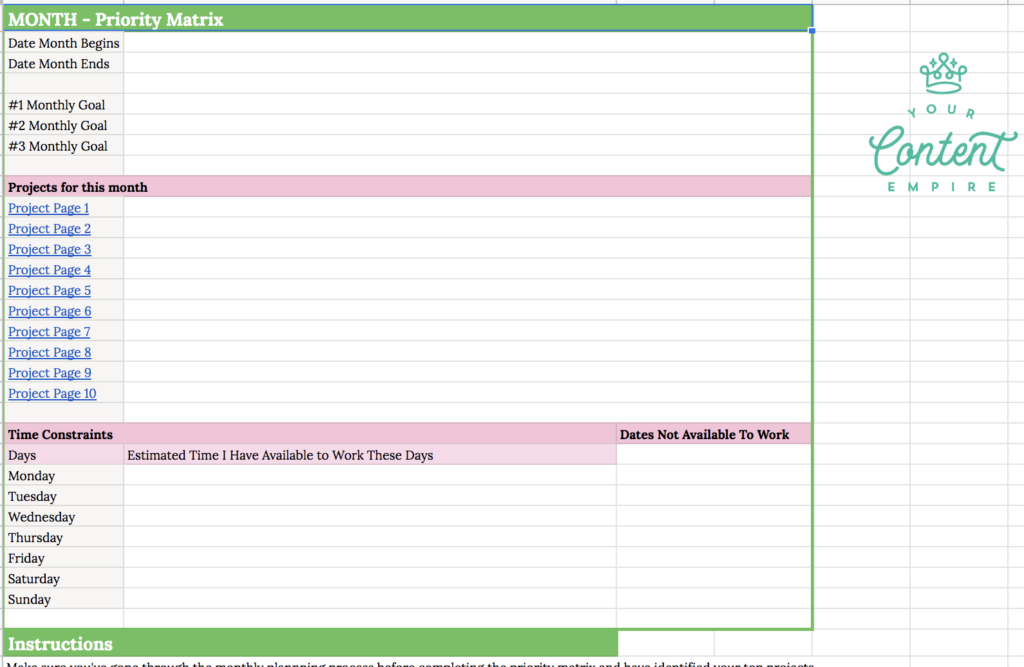
In the spreadsheet, there is room for up to 10 goals as well as space to identify three goals that you're working towards.
STEP 2: FILL OUT THE MONTHLY SUMMARY

- Put the dates in when the month begins and ends (if you’re starting mid-way through the month, you can put whatever date you’re starting in this space instead)
- Add your top 3 goals for the month so that you can keep them top of mind
- Add your projects to the projects list (you have space to add up to 10 here, although I like to save 1 project for client work and 1 for miscellaneous tasks)
- Add your time constraints – put in the estimated time you have to work on these projects per week day and then also add your work blackout dates which you’ll be taking off. Keep in mind that not all of your work time is workable so don’t add 8 hours when that’s all you have available (some of that will naturally be taken up for those daily business tasks like email, etc.)
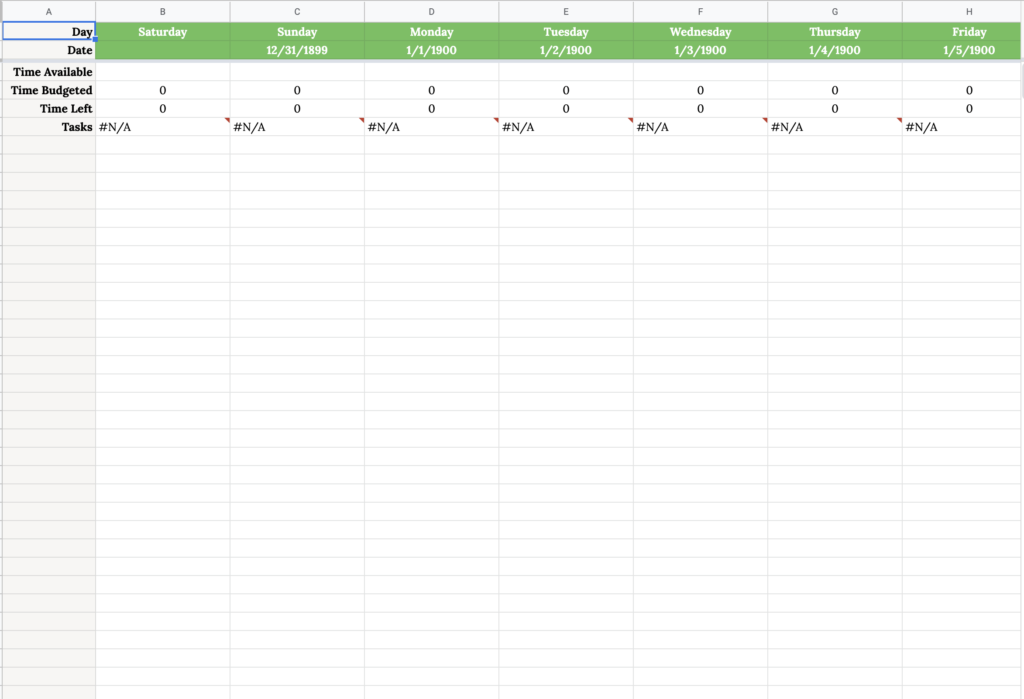
- Once you have those days that you're not available to work, go over to the master calendar tab and change the time available to work on those days to zero.
STEP 3: BUILD OUT YOUR PROJECT ACTION PLANS (EVERYTHING EXCEPT DATE OF ACTION)

For each project in your list…
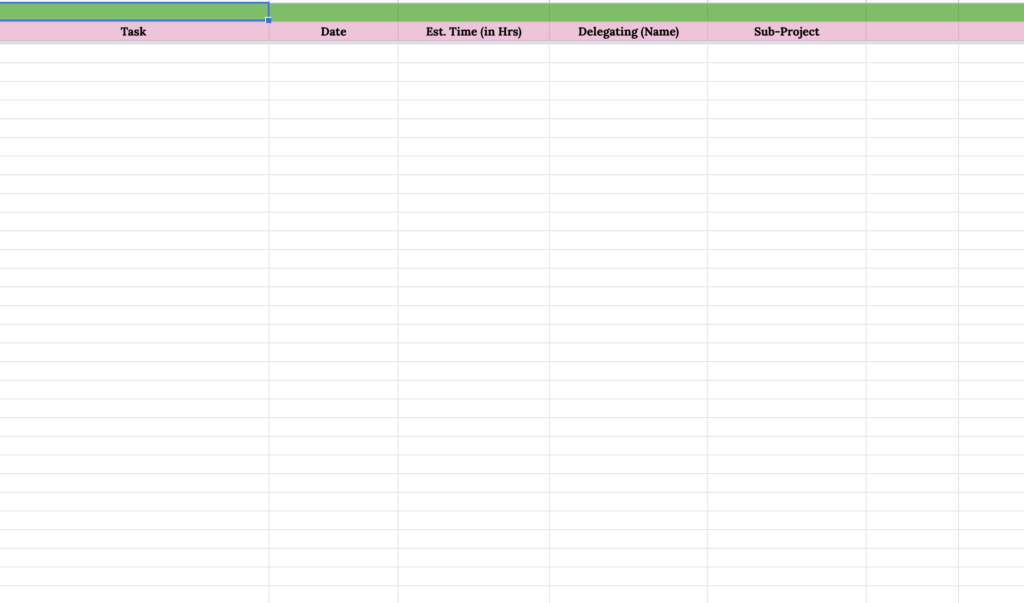
- Go to the tab in the spreadsheet for that project
- Brainstorm all of your action items
- Add the time estimated for each task
- Add who’s responsible for the task (leave blank if you’re the one doing it)
- Add the subproject if you’re grouping any of the tasks together
Complete for the rest of your projects
STEP 4: ADD YOUR DATE OF ACTION
Next, we’re going to assign the day you’re going to be completing the task.
This is both different and more useful than the due date. It informs your to-do list and if you have a task that is going to take more time than 1 day, it’s a sign that you need to break it up into smaller actions.
- Go through each of your projects and begin assigning action dates
- You’ll want to check against the master calendar to make sure that you’re not over-planning your workload for any particular day compared to the time you have allotted for that day.
- If any tasks are being done by someone else, they won’t count against your total but you can still add a date for these so you know when to delegate/expect them back.
- Continue until every single task has an action date attached to it
I like to give myself +/- 30 minutes for each day (well, it’s great if there’s less, but not over time). Most people will realize that they have more than adequate time for the tasks/projects they’re working on and will feel empowered to know they their projects are achievable as long as they work those plan. But there are some other scenarios that can arise:
You’re overbooked like crazy: Your days are so booked up that it’s impossible to simply shift things around. You have two choices: Add more work time or scale back the number of scope of projects you’re working on.
Even though it looks like you have all the time needed, you’re not finishing your daily tasks: It might be time to do some time-tracking because you’re either getting sucked in/distracted by other things OR you’re not estimating how long things are going to take you accurately. This will get closer and closer each time you use this method to action plan your month.
STEP 5: Export Your Action Plan (Optional)

This is an optional but for myself, really essential. I use Asana to manage all of our YCE team projects and client work, so this is a way of efficiently adding all of those tasks (including due dates, assignees and sections).
If you’d like to use this step, here’s how to do it for Asana:
- Go to the master task list tab
- Filter the first project you’re exporting (you have to export them project by project) by clicking on the project column and deselecting all of the other projects
- Select all rows (not header) and copy
- Go to the EXPORTER tab and paste the rows without formatting (right click in cell where you’re putting the first task > paste special > paste values only)
- In the responsible column, add the email address for the person responsible for the task (including yourself) and paste these for all the tasks that person is responsible for
- When you’re done, go to file > export > CSV
- Go to the Asana project where you’re upload. Near the title of the project (top), click on the downward arrow > import > CSV
- Drag the CSV file you just downloaded
- Match up the columns correctly (due date, responsible, task name, subproject/section, description = time estimated)
Voila — Action plan and project management tool in sync!
What’s Next
After I've done this part, it's simply a matter of working the plan.
On a weekly basis, I’ll review the spreadsheet, add or shift any missing action items and check in on my progress towards completely my monthly projects. If I’m hitting those daily actions, success is inevitable. And if I’ve chosen my projects based on around my goals for the month, success is much more likely too.
So if you want to test out my secret productivity weapon, go and download my spreadsheet now …


